

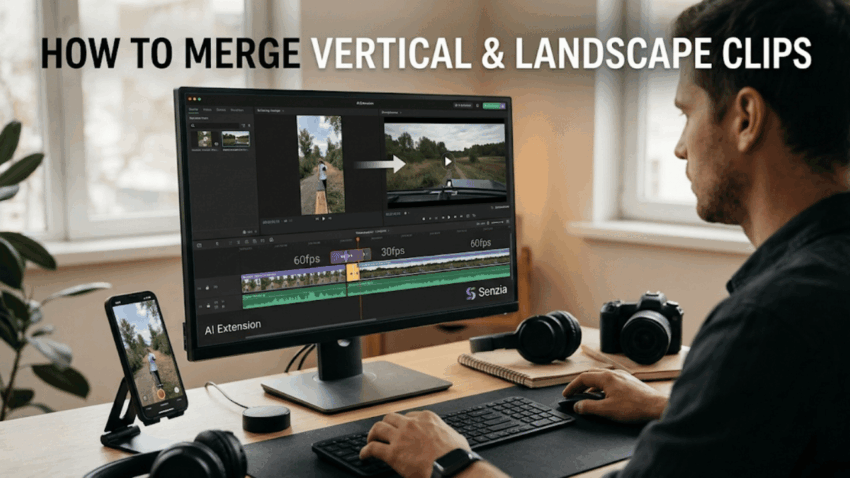
Stitch a 60fps camera file onto a 30fps phone clip with a basic joiner and the playhead jumps right at the cut. This guide explains why mismatched clips break and how to merge them into one smooth file in the browser, then extend a short ending with AI.
Step 1: Understand why a simple join stutters, then open Senzia
Most joiners are built for one case: clips that came off the same camera with the same settings. Once you mix devices, the cracks show up at the cut.
Stream-copy joins only work when every file shares the same size and frame rate
A stream-copy join doesn’t re-render anything. It places one file’s data after another’s, so it only behaves when every file has the same dimensions and the same frame rate. Put a 60fps clip next to a 30fps one and the player has to switch timing in the middle of playback. That switch is the hitch you see. The same thing happens with a vertical clip followed by a horizontal one: the frame size changes abruptly, and some players freeze for a moment or show a green flash.
| What differs between clips | What you notice at the join |
| Frame rate (60fps vs 30fps) | Motion jumps or the playhead stalls |
| Frame size (vertical vs horizontal) | The picture snaps or the player glitches |
| Audio format | A pop, a gap or a volume jump |
Senzia’s AI merge videos tool normalizes size, frame rate and audio before it joins
Senzia’s AI merge videos tool takes a different route. Before it joins anything, it brings every clip to the same size, the same frame rate and the same audio setup. The result is one file that plays like it was recorded in one sitting. If you’ve been looking for a video merger that doesn’t leave seams, that preparation is the part that matters.
Merge to video online handles phone, screen recording and camera files in one list
You don’t need to sort your files by source first. A merge to video online project takes phone footage, screen recordings and camera files in the same list, so you can drop in everything from the shoot and deal with the order later.
Step 2: Upload the clips and pick the output canvas
Gather the files you want in the final video. Rename them if it helps you remember which is which, though you can also sort them out visually once they’re loaded.
Add up to 20 files, each up to 500MB
One project takes up to 20 files, and each file can be up to 500MB. That covers most multi-clip projects, from a few quick phone takes to a long screen capture. If you want to merge videos online free of any desktop software, and without splitting the job across several sessions, those limits give you plenty of room.
Choose the canvas first when you combine videos shot vertical and horizontal
When you combine videos shot in both orientations, decide the output canvas before anything else. Pick vertical if the final video is going to a phone feed, and horizontal if it’s going to a website or YouTube. Everything else gets fitted to that canvas, so the choice shapes how the whole video looks. Make the call early and you won’t have to rebuild the project later. If you already know the ending will run short, it’s worth knowing that an uncensored video extender can add seconds to it afterward, so you don’t need to worry about the length at this stage.
Merge video clips online at mixed frame rates without converting them yourself
You don’t have to open another app to convert frame rates. When you merge video clips online here, a 24fps clip, a 30fps clip and a 60fps clip can sit in the same project, and the tool matches them for you. People often search for ways to combine videos online free of any extra software, and this is where that saves the most time.
Step 3: Set the order, the trims and the transition at each join
With the files loaded, the rest is arranging.
Drag clips into play order and trim heads and tails to the right frame
Drag the clips into the order you want them to play. Then trim the head and tail of each one so the cut lands exactly where the action starts or stops. Small trims make a big difference. Cutting one second of dead air from each clip adds up to a much tighter video once you merge videos from six or seven takes.
Keep the default hard cut, or add a fade only on the join
You have two options at each join:
- Hard cut: the default, and usually the right choice for demos, tutorials and fast edits.
- Fade: a soft blend applied only at the join, useful when the scene or the mood changes.
If a clip change already feels natural, leave the hard cut alone.
Combine a video with a new audio track, or keep the clip audio under it
You can combine a video with a new audio track, such as a voiceover or music, or keep each clip’s own audio running underneath. Keep the clip audio under the new track when the original sound matters, like a person talking on camera. Replace it fully when the footage was recorded in a noisy place and you’d rather have clean narration.
Step 4: Preview the merged file and fix any bad cut
Don’t skip the preview. A cut that looked fine in the timeline can feel wrong when you watch it at full speed.
Play the full file and check each cut point, the audio sync and the last frame
Play the whole file from the first frame to the last. Pay attention to three things:
- Each cut point: does the picture move smoothly across the join?
- Audio sync: does the sound match what’s happening on screen?
- The last frame: does the video end where you want it to, or does it feel cut off?
Reorder and run the video merger again if a clip lands in the wrong place
If a clip is in the wrong spot, move it and run the video merger again. It’s a quick fix. Catching the problem here is far easier than finding it after you’ve uploaded the file somewhere public.
Step 5: Extend or reframe the merged clip with AI
Once the merged file plays cleanly, you can use AI to change its length or its shape.
Use video to video extender AI to add new frames at the start or the end
Video to video extender AI works from your own footage. You choose whether to add new frames at the start or at the end, and the AI builds them from the clip you already have. This is the fix for an ending that stops too fast, and it’s why an AI video extender is worth trying before you go back to reshoot anything. An AI video extender online free of any install runs in your browser, so you can extend ai video free of desktop software and add the seconds your ending needs. An AI video length extender is most useful when the clip is nearly right and only needs a few extra seconds.
An uncensored video extender continues the shot you filmed and follows your prompt as written
An uncensored video extender continues the shot you filmed and follows your prompt as written, rather than rewriting your instructions into something else. So if you ask for the camera to drift left while the subject keeps walking, that’s what the new frames are built around. Keep the prompt specific and short, and describe motion rather than adding new subjects.
The AI video aspect ratio extender turns the horizontal cut vertical without black bars
Say you’ve finished a horizontal cut for YouTube and now need a vertical version. Cropping loses the sides, and black bars make the video look unfinished. The AI video aspect ratio extender fills in the missing top and bottom, so the original frame stays whole inside a taller canvas.
In the end, a single pass through a good merge gets you a file that plays smoothly, and the AI tools take care of the two things a basic joiner can’t: a short ending and a mismatched frame shape. You start with clips from different devices, different orientations and different frame rates, and you finish with one video that you can publish in two formats. Next time a folder of mismatched footage lands on your desk, you’ll know where the stutter comes from and how to avoid it.
